I’m back!

This time for real! I had a friend recently ask me to get back to this blog so here I am. Life got busy, people. Its been 2.5 years since the last time I even logged in! Since the last time you’ve heard from me I had another baby (my 4th in as many years) acquired a dog, moved like 2-3 times and who knows what else. We finally settled down and bought a house so I can say with great confidence we won’t be moving again anytime soon.

And you know the crazy thing? I’m averaging 150-200 new visitors a day here even though I have completely failed to manage it at all. I started and abandoned this blog before I had ever heard of Pinterest. So I’m coming out of the gate here with probably 100 new recipes I have tried or want to try soon. Score! Happy New Year! See you again soon!

Pizza Craze Part 2

There is something about homemade pizza that just isn’t as satisfying as the stuff they serve at your local pizzeria. Maybe its the oven, you just can’t get the same effect at home. Nonetheless, I continue to search for the best sauce and crust recipe. To date, I have found neither.

When making pizza at home I always make my own crust. You know when you get the stomach flu, whatever you ate before that sounds like the most disgusting food in the world for the rest of your life? Even if what you ate had nothing to do with you getting sick? For me, that is store bought pizza crust, like Boboli. I think I was 9 and have never even been able to look at them without a little wave of nausea since then. So all pizza crust has to be made from scratch.

Previously I posted this crust recipe. Its a decent recipe but a little thicker than my preference and a little bland. So I continue to search. I have two other recipes I’ve tested to share for crust, both decent, one thick, one thin, but again a little bland and not ‘the one.’ I also have a sauce recipe that came with hundreds of 5 star reviews from allrecipes.com but if I’m being honest, I did not like it at all, neither did my kids. My husband ate it but he’ll eat anything. The sauce was too sweet and too spicy. Too many ingredients I think. To date my favorite pizza sauce for homemade pizza is a can of  this stuff but I am trying to find a good recipe from scratch. Anyway, as I continue to test more recipes for sauces and crusts in search of the perfect one, I’ll post them here. If you have a tried and true, perfect recipe for either, I would love to hear it!

For the sauce I did not love, but maybe you will:

“Exquisite Pizza Sauce”

  • 1 (6 oz) can tomato paste
  • 6 oz warm water
  • 3 Tbsp grated Parmesan cheese
  • 1 tsp minced garlic
  • 2 Tbsp honey
  • 1 tsp anchovy paste
  • 3/4 tsp onion powder
  • 1/4 tsp dried oregano
  • 1/4 tsp dried marjoram
  • 1/4 tsp dried basil
  • 1/4 tsp ground black pepper
  • 1/8 tsp cayenne pepper
  • 1/8 tsp red pepper flakes
  • salt to taste

In a small bowl, mix together. Allow to sit for 30 minutes for the flavors to blend. Spread on pizza crust.

Thick Crust 2:

  • 1 packet dry active yeast
  • 1/2 tsp brown sugar
  • 1 1/2 cups warm water
  • 1 tsp salt
  • 2 Tbsp olive oil
  • 3 1/3 cups all purpose flour

In a large bowl dissolve the yeast and sugar in the water, allow to sit for 10 minutes.

Stir in salt and oil. Mix in 2 1/2 cups of flour. Turn dough onto a well floured surface and knead more flour in until no longer sticky. Place dough in a well oiled bowl and cover with a cloth, let rise until double, about 1 hour.

Punch dough down, form a tight ball. Let relax a minute then roll out onto a lightly oiled pan. Top with your ingredients and bake at 425 for 15-20 minutes.

For a thinner crust: (my favorite to date, sorry, I don’t have a picture!)

  • 1 packet dry active yeast
  • 1/4 tsp sugar
  • 3/4 cup hot water
  • 1 3/4 cup flour
  • 1/2 tsp salt

Dissolve yeast and sugar in hot water.  Let sit for 8 minutes. Meanwhile, mix flour and salt.

Pour yeast mixture over flour mixture and mix well. Turn onto a well floured surface and knead for 2 minutes. Spread onto a greased pan, top with your favorite ingredients, bake at 500 for 8-10 minutes.

My True Passion: Cake!

I am an amateur cake decorator. I absolutely love to make cakes, if I could do it full time, I would. I have no formal training of any sort, just a decent set of Wilton icing tips and a passion to spend my free time making sweet stuff.

I thought I’d show you this technique I used to make what turned out to be my most awesome creation to date. My nephew turned 6 and for his gift I made him a cake I hope he’ll remember for years to come. As per his request, it was a chocolate Wolverine cake.

I made the cake and icing from scratch and I’ll post those recipes shortly.

Ok, step one:

Find the art you want on your cake. Now this wolverine image was quite detailed and the most difficult one I have attempted. I don’t really think this technique takes a whole lot of skill, just a heck of a lot of time and patience. This cake took me about 8 hours, but that includes baking time and making my icing from scratch. When choosing your art, keep in mind how many lines there are and the level of detail.

Step 2: Size the picture to fit on the cake you are going to make. Get a piece of wax paper, a fine tip pen, and your picture.

Step 3: Trace the picture onto the wax paper. Using the cake pan, make sure the image will fit on your cake.

Step 4: Flip the tracing over so it is a reverse image. Tape it down to a cutting board. Don’t forget to flip it, the icing will soak up the ink of your image and the finished product will be backwards from your original print. Keep your original print nearby for reference.

Step 5: I know I said I made my icing from scratch, but for the tracing purposes, buy a can or tube of black frosting. You will not be able to create the texture or even color needed for this part. For this cake, I used this stuff:
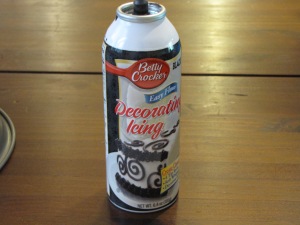
This can came with tips for piping right out of the can. Don’t waste your time. You will need the finest tip Wilton makes, tip 1, and a piping bag.

Step 6: Carefully trace the image with icing. I’d recommend starting from the top down or from the center, out. Careful not to rest your hand in it or you’ll be starting over.

Because this was such a detailed picture to work with, with icing at least, I used a toothpick to clean up my lines and make sure important parts, like his face, were perfect.
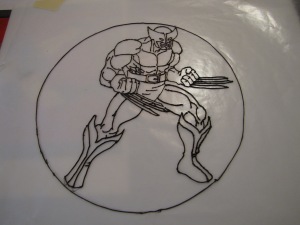
Step 7: Start filling in your image. Think of it like a stained glass window. I started filling in the black since I already had it going.

*After you are done tracing and after filling in the tiny spots, you can use a bigger tip to speed up the process. I used a number 3 tip for most of the filling in.

Then using your prepared butter cream frosting, fill in the rest.
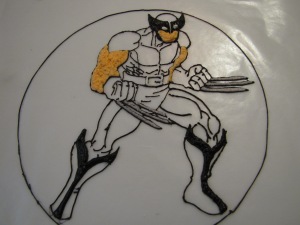
Keep in mind, what you are looking at will be the back, so keep layers in mind. Under the face I already filled in his mouth and the black lines of his face are still there.

After you are done filling in, put one more layer over the entire thing and make it all as even as possible.

Step 8: Put it in the freezer for 2+ hours. You can make this a day ahead and keep in the freezer overnight. Prepare the cake for decoration.

Tip: freeze your cake before you frost. It is 10 million times easier to frost a frozen cake than it is a non-frozen one. Put a ‘crumb’ layer on your cake. A crumb layer is a very thin layer of frosting, and then frozen. This will keep all crumbs off of the surface icing.

You need a perfectly flat top of cake. To achieve this, make a cake from scratch, they do not rise the same way box mixes do and you’ll have a more level cake to work with. Use a knife to even out the top if needed. When stacking layers, make sure your top layer is “bottom side up.”

Step 9: Take your frosting transfer out of the freezer and carefully put it on the top of your cake.

Carefully peel off the wax paper.

Finish up by frosting the sides of your cake.

And, we are all done!

A Vegetable Salad

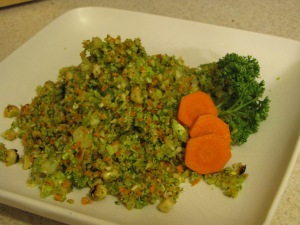
Last Sunday we picked up a raw vegetable salad at a local market. It was really good and after a close look I realized how easy it would be to make! Tonight I tried to recreate it without following an actual recipe and its pretty much the exact same thing we bought last weekend.

This is basically a relish tray as a salad, with a quinoa like quality. Its a great way to use up the vegetables in the bottom of the refrigerator at the end of the week! I’d recommend using broccoli or cauliflower as a base and then whatever else you’d like. You’ll also need some sort of dressing, again, whatever you would normally prefer on a relish tray or in a salad would be perfect. The one we bought in the store came with ranch, tonight we used sesame ginger vinaigrette.

I used broccoli, cabbage, bell pepper, carrots, onion, and leftover grilled corn kernels. All you have to do is throw it all in the food processor. The green onions I just sliced and threw in, the corn, I also just threw in.

Here is the texture you will be going for, my broccoli base:

All Done!


Grilled Balsamic Portabello Mushroom Burgers

I really am not a huge mushroom fan so for years I have avoided any sort of burger with a giant mushroom in place of the meat. But when one of my sisters made a delicious marinade for mushrooms and grilled them, and they were really, really good, I thought maybe it was time to try a portabello (is it portabello or portabella?) burger. I used her marinade, another sister’s hamburger recipe, and a complete stranger’s bun recipe to make this.

If you are at all concerned about having to eat an enormous vegetable when what you really want is beef, please trust me, you will love it. It doesn’t feel like its missing meat, its not a chore to eat for you non veggie lovers. Its delicious. It is so juicy and wonderful, I could honestly eat these every day.

One important tip, when it comes to cleaning the mushrooms, do not just rinse them in water before attempting to remove the gills. I did this on my first try, the mushroom soaked up all the water and turned to mush in my hands as I tried to scrape off the gills. Instead, remove the gills with a spoon before washing them. To wash them, I used a wet paper towel and gently wiped them clean to keep the mushrooms from acting like a sponge and soaking up a ton of water.

Despite these tips, I still hate cleaning the mushrooms. I feel clumsy and like I am mutilating it. The gills are edible but will give the finished burger an ugly color. If there is a better way to clean and remove the gills, I would love to hear! But in the very end, after marinading in a dark marinade and then being grilled, they really don’t look like I did a terrible job cleaning them. But still, I am unhappy with how they look before they go in the ziplock bag, so I’d really love to hear from you if I am doing it wrong.

For the marinade:

  • 2/3 cup olive oil
  • 1/2 balsamic vinegar
  • 2 1/2 tsp. finely chopped garlic
  • 1/3 tsp. kosher salt
  • 1/3 tsp. pepper
  • 4 portabello mushrooms, cleaned and gills removed

Note my clumsy, half destroyed looking “cleaned” mushroom:

In a ziplock bag add all marinade ingredients. Shake to mix, add mushrooms, toss to coat, refrigerate for 4+ hours (can be marinated overnight.)

Heat grill and prepare toppings. For my burgers went with tomato, onion, asiago cheese, fresh basil, arugula, this aioli, and these buns.

Grill for about 8-10 minutes, 4-5 on each side. Don’t worry if it looks like it may be burned, it isn’t, the balsamic is very dark and the mushrooms has just absorbed all the color. Just don’t burn them for real and make a liar out of me!

Ready to go on the grill!

And the cheese getting all melty and perfect:

Lemon Garlic Aioli

I got this recipe from my sister. Every time I make it, I need to call her because I lost whatever scrap of paper I wrote it down on. Now, it will be on the internet forever and I’ll never need to ask again!

This is a really great dressing for hamburgers, which I believe it was designed for. I use it on my grilled portabella burgers, it is incredible. If you are not a gung ho garlic eater, maybe you should stick to 2 cloves instead of 3. As far as the raw egg, there is always a risk eating raw egg but its low.

  • 3 garlic cloves
  • 1 egg
  • 1 Tbsp. lemon juice
  • 1 Tbsp. parsley
  • 1/2 tsp. salt
  • 1/4 tsp. pepper
  • 1/2 cup olive oil

In a food processor, add all but the olive oil.

Mix it all up til it looks something like this:

Then very, very slowly stream the olive oil into the mix, while running the food processor constantly until aioli is thick and creamy. Your end product should look like this:

Grilled Corn on the Cob

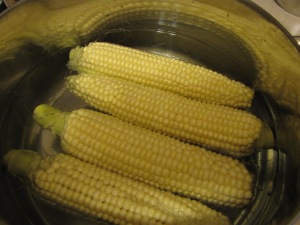
Here’s another easy-peasy one, one of our summertime favorites. I’m working on finding the perfect sauce recipe to accompany this, but really, plain old salt and pepper and butter are fantastic on these.

  • Corn on the cob, shucked
  • water
  • salt and pepper (optional)
  • butter (optional)

Soak the corn in water for about 10 minutes. Don’t cook it in water! Just soak it.

Then throw them on the hot grill for 10-15 minutes, turning occasionally as the kernels blacken. Serve with salt, pepper and butter!

Simple Coleslaw

I used to think I didn’t like guacamole. Turns out, I just didn’t like that green stuff that Taco Bell calls guacamole. I don’t know what that stuff is, but its not guacamole. Then my friend Suni made a bowl of fresh guacamole and forced me to try it against my will. It was delicious, and from then on I vowed to always try anything once. And I learned how much better things were when they were with real, fresh ingredients. Now before you think I’m nuts to have never tried real guacamole, I was about 15 at the time and an exhaustingly picky eater. Hmm, maybe that’s where my kids get it.

I also I used to think I didn’t like coleslaw. That’s because I don’t like what KFC calls coleslaw and I had never had it any other way. While I was pregnant last summer, I had a hankering for pulled pork. I went to the booth on Treat Street at the county fair and ordered one and they asked if I wanted the slaw on the side or on my sandwich. Gross! On the side! No, I don’t want any at all! I thought. As I waited for my sandwich, I over heard 90% of the people behind me also refuse the coleslaw. “Its how they do it in the south,” the booth worker explained each time someone gave him a weird look.

So I went and ate my slaw-less sandwich and thought about it. A curious thing about pregnancy, although it can make to most delicious things sound revolting, like coffee or In and Out, as in may case, it can also make weird things sound good, and coleslaw sounded good. So when I went to order my second sandwich (Hey! I was eating for two!) I got the coleslaw on it. The texture was amazing. The crunch to counter the tenderness of the pork, ahhh.

From that point on, I wanted a simple coleslaw recipe for when I make my pulled pork. I am still rather picky and don’t think things like sugar belongs in salads, slaws, and spaghetti sauce, to name a few. That made narrowing the list of recipes down quite easy. I also knew to run from anything titled “KFC’s Coleslaw Recipe” or anything that called for miracle whip. (What on earth is that nasty stuff? Mayonnaise with sugar? Who actually eats it? On purpose?)

Once I narrowed my search down, I found this little gem. Simple, delicious and so perfect on my pulled pork. You could add a few vegetables and maybe some chicken to take a great salad in a different direction. But for the foundation the perfect, simple coleslaw, here you go.

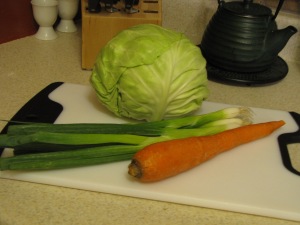
  • 4 cups, unpacked shredded cabbage, red, green, or both
  • 1/2 large carrot, julienned
  • 2-4 green onions thinly sliced

For the dressing:

  • 1 Tbsp. olive oil
  • 1 Tbsp. seasoned (or plain) rice vinegar
  • salt
  • fresh pepper

Combine cabbage, carrots, and onions in a large bowl. Add olive oil, toss to coat. Add vinegar, salt and pepper to taste. Serve on pulled pork or as is!

Homemade Hamburger Buns

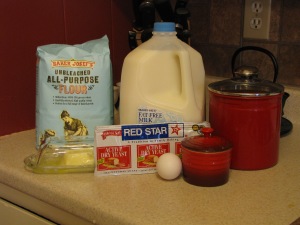
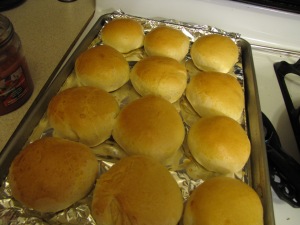
These delicious, hearty buns are a great alternative store bought buns. Sure, they take a bit of time to make, but with a total of 8 natural ingredients, they sure beat all the additives and preservatives you’ll find in the grocery store. They are hearty, soft, and very much worth the work!

A few tips, if you happen to have a Kitchenaid mixer with a dough hook but have never tried it (like me!) here is your chance! I can not believe how much easier making bread will be in the future without having to knead. I also can’t believe I never tried the dough hook before in the 5 years I’ve had the thing.

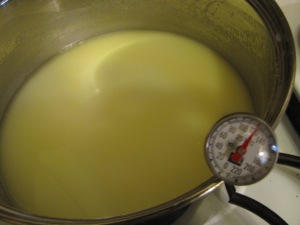
Secondly, make sure you use a thermometer to check the liquids before you add them to your yeast and flour. For this recipe, you will need it to be between 120-130 degrees F. Any lower, your yeast may not activate, any higher, you may kill it.

  • 1 cup of milk
  • 1 cup of water
  • 2 Tbsp. butter
  • 1 Tbsp. sugar
  • 1 1/2 tsp. salt
  • 5 1/2 cups all purpose flour
  • 1 envelope of dry active yeast
  • 1 egg yolk
  • 1 Tbsp. water

1. Combine the milk, 1 cup of water, butter, sugar, and salt in a saucepan. Bring to a boil. Remove from heat and let stand until lukewarm. (120-130 degrees.)

2. In a large bowl, stir together flour and yeast. Pour in wet ingredients and stir until dough starts to pull together. Mix on dough hook for 8 minutes, or knead on a floured surface for 10 minutes. Place in a greased bowl and turn to coat. Cover and let stand until doubled in size, about 1 hour.

3. Punch dough down and divide into 12 portions, each a little larger than a golf ball. Make tight little balls out of the dough by pulling the dough down and pinching it at the bottom. Place dough on a baking sheet lined with parchment paper or aluminum foil. After rolls sit for about a minute and relax, flatten each ball with the palm of your hand until 3-4 inches wide. Set balls aside until double in size, about 20 minutes.

4. Preheat oven to 400. Mix together egg yolk and 1 Tbsp. water in a small bowl. Brush on top of rolls. Position oven racks so they are not too close to the top or the bottom of oven.*

5. Bake for 10 minutes. Remove the rolls from one rack and put on the other. Bake an additional 5-10 minutes until browned on top and bottom.

*I’m not sure this moving the pan and rack step is really needed, but it was in this recipe, which I got from allrecipes.com and suppose its there for some reason.


And I am back!

Its been over 6 months since my last post, and I have to say, I thought maybe I was just going to let this blog slip off into a black hole somewhere on the internet. In these last 6 months, I had a baby, moved across town, and… well that’s about it. But that is the reason this blog has suffered.

I recently watched Food Inc. and at the very least, am compelled to cook better with fresher, cleaner ingredients, mainly for the health of my family. There is still plenty of bad stuff in my kitchen and we can not afford to buy all of our groceries at Whole Foods, but with a little more effort and planning I’ll be taking this blog in a slightly different direction. Think fresh, from scratch (as much as possible), simple, and maybe even a few original recipes, by me.

Being in California, we are blessed with an array of fresh and local fruits, cheeses, meats, wines, with just about everything else you can think of at our fingertips. Its a shame to not put that to good use. This is already becoming a fun hobby, planting our own herb garden, getting up on Saturday mornings to enjoy the sun at the local farmers market, and yes, even reading labels.

I plan to regularly add new recipes, edit some old ones, and delete the ones that I have decided really, weren’t very good. I know I’m not the best cook, I’m not even sure I’d consider myself a good cook since just about every time I forgo an actual recipe, disaster strikes. But I hope to continue to use this blog to learn how to utilize the ingredients around me, how to be a creative and fresh cook and share what I find with you. (If anyone out there is still reading!)